MinIO介绍
参考:https://www.cnblogs.com/yuxl01/p/16226701.html
MinIO 是一个高性能的对象存储系统,常用于存储大量非结构化数据,例如图片、视频、备份文件等。它以分布式方式运行,确保数据的高可用性和可靠性。
PVC概念(Persistent Volume Claim)
在Kubernetes中,Persistent Volume (PV) 是集群中由管理员提供的一块存储资源,而Persistent Volume Claim (PVC) 则是用户对存储资源的请求。PVC允许用户动态地申请存储资源,并将其挂载到Pod中,以便持久存储数据。
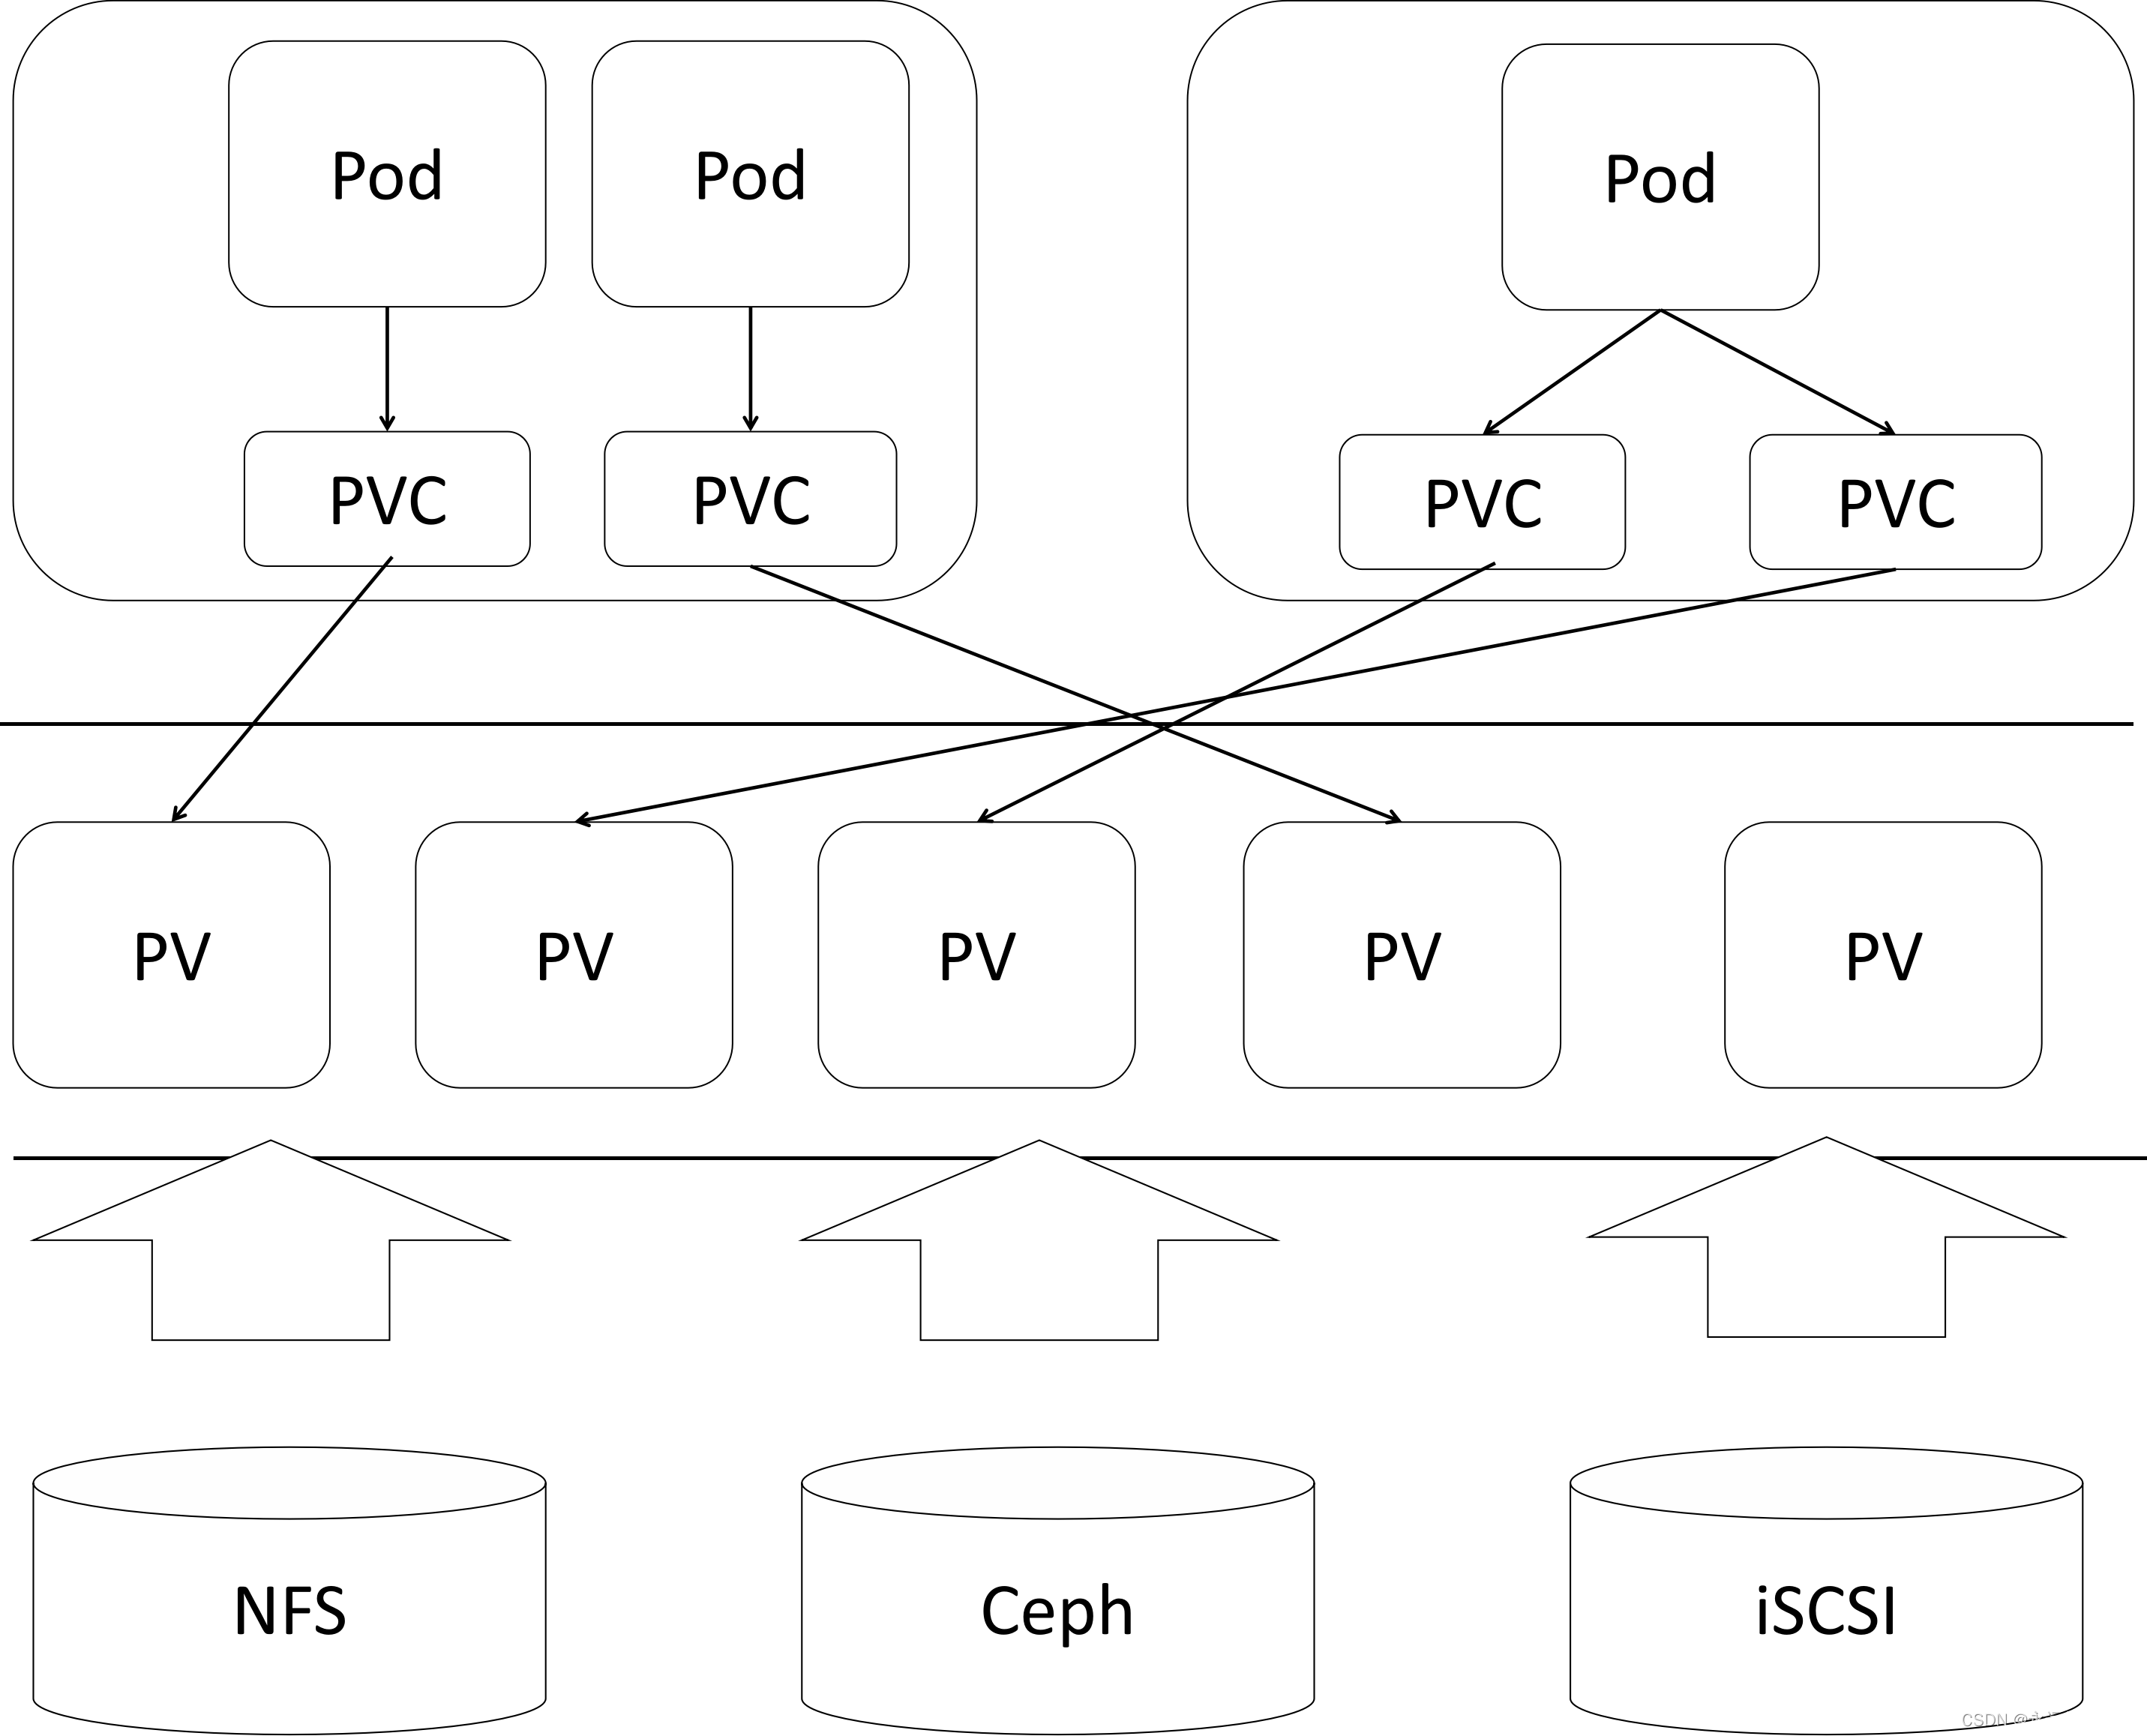
MinIO与PVC的结合
将MinIO作为PVC挂载使用,可以使应用程序方便地使用MinIO提供的存储资源,并且通过Kubernetes的调度和管理功能,保证存储服务的高可用性和可扩展性。
大致流程如下:
用户 <–> MinIO:用户上传或下载数据。
MinIO <–> PVC:MinIO的部署配置请求存储资源(PVC)。
PVC <–> PV:Kubernetes将PVC绑定到合适的PV,提供实际的存储资源。
PV:实际存储数据的位置。
配置步骤
写一个简单的demo,演示一下上传一条记录到minio的过程
创建相关存储服务
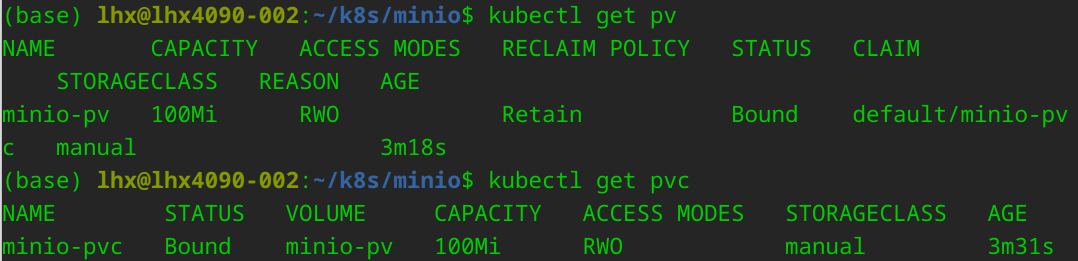
1. 创建Persistent Volume (PV) 和 Persistent Volume Claim (PVC)
创建一个PV配置文件 minio-pv.yaml,给这个PV分配10G空间
1
2
3
4
5
6
7
8
9
10
11
12
13
| apiVersion: v1
kind: PersistentVolume
metadata:
name: minio-pv
spec:
capacity:
storage: 100Mi
accessModes:
- ReadWriteOnce
persistentVolumeReclaimPolicy: Retain
storageClassName: manual
hostPath:
path: "/mnt/data"
|
创建一个PVC配置文件 minio-pvc.yaml:
1
2
3
4
5
6
7
8
9
10
11
| apiVersion: v1
kind: PersistentVolumeClaim
metadata:
name: minio-pvc
spec:
accessModes:
- ReadWriteOnce
resources:
requests:
storage: 100Mi
storageClassName: manual
|
2. 部署MinIO
创建一个MinIO部署文件 minio-deployment.yaml,使用前面创建的pvc
1
2
3
4
5
6
7
8
9
10
11
12
13
14
15
16
17
18
19
20
21
22
23
24
25
26
27
28
29
30
31
32
33
34
35
36
| apiVersion: apps/v1
kind: Deployment
metadata:
name: minio-deployment
labels:
app: minio
spec:
replicas: 1
selector:
matchLabels:
app: minio
template:
metadata:
labels:
app: minio
spec:
containers:
- name: minio
image: minio/minio:latest
args:
- server
- /data
ports:
- containerPort: 9000
env:
- name: MINIO_ACCESS_KEY
value: "minioadmin"
- name: MINIO_SECRET_KEY
value: "minioadmin"
volumeMounts:
- name: minio-storage
mountPath: /data
volumes:
- name: minio-storage
persistentVolumeClaim:
claimName: minio-pvc
|
创建一个MinIO服务文件 minio-service.yaml,用于提供一种访问方式
1
2
3
4
5
6
7
8
9
10
11
12
13
| apiVersion: v1
kind: Service
metadata:
name: minio-service
labels:
app: minio
spec:
type: LoadBalancer
ports:
- port: 9000
targetPort: 9000
selector:
app: minio
|
踩坑:由于在本地环境下,LoadBalancer 类型的服务不会自动获得一个外部 IP 地址。即:

所以改为NodePort类型的服务。
NodePort 是一种服务类型,它在所有集群节点的一个静态端口(NodePort)上为服务开放一个端口。这意味着你可以通过任何节点的 IP 地址加上这个端口来访问服务。
修改后的yaml文件为:
1
2
3
4
5
6
7
8
9
10
11
12
13
14
| apiVersion: v1
kind: Service
metadata:
name: minio-service
labels:
app: minio
spec:
type: NodePort
ports:
- port: 9000
targetPort: 9000
nodePort: 31909
selector:
app: minio
|
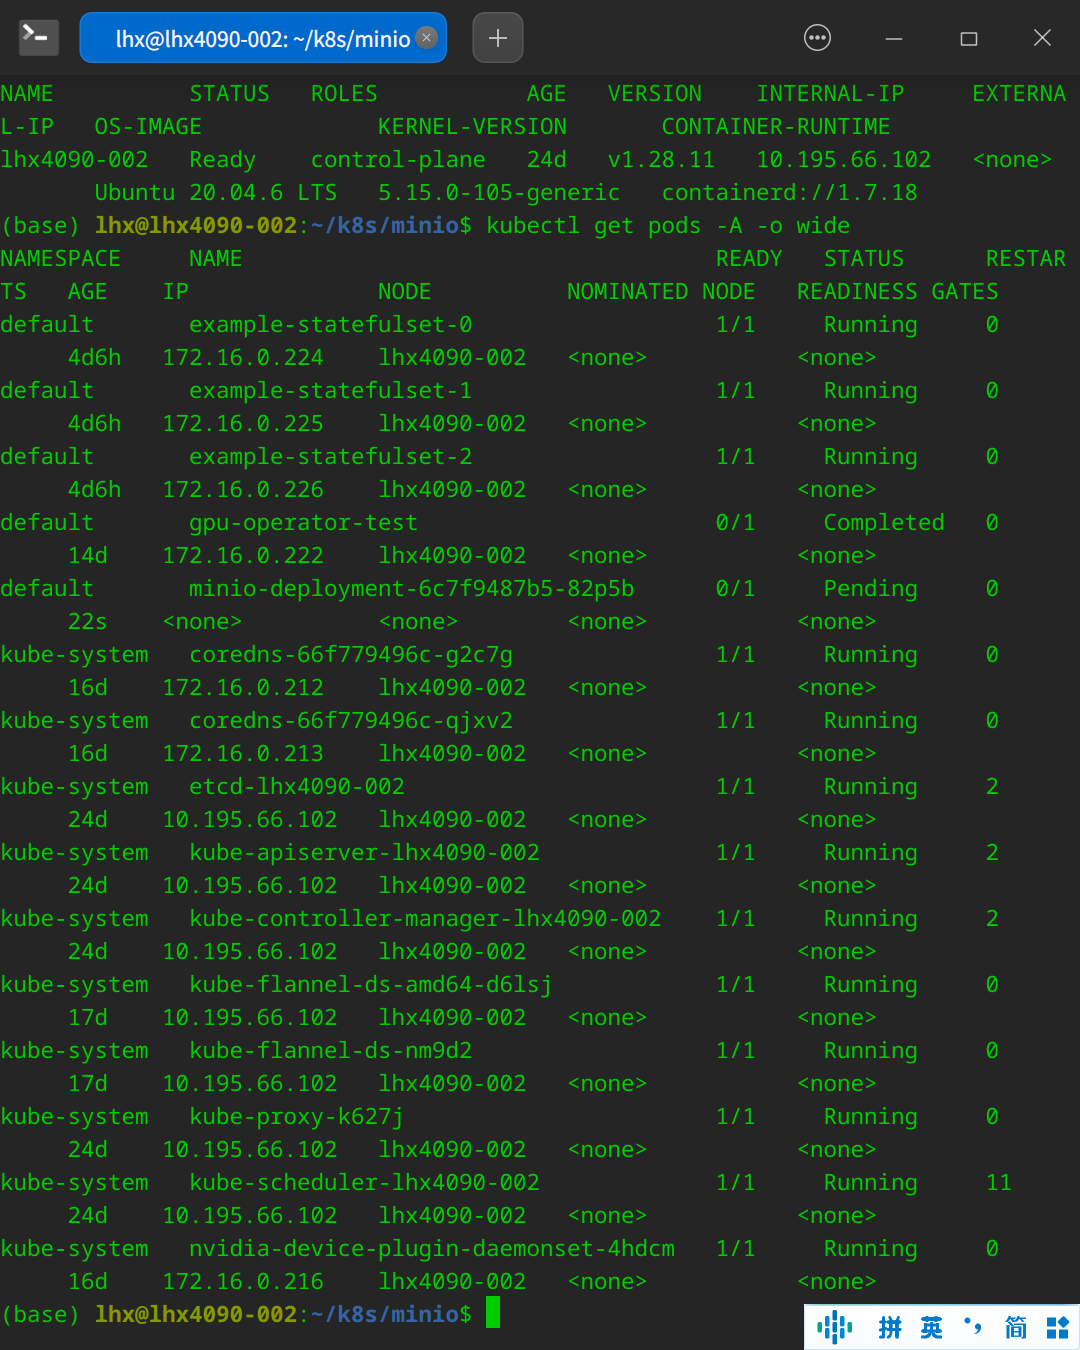
3. 应用配置文件
使用 kubectl 命令行工具应用这些配置文件:
1
2
3
4
| kubectl apply -f minio-pv.yaml
kubectl apply -f minio-pvc.yaml
kubectl apply -f minio-deployment.yaml
kubectl apply -f minio-service.yaml
|
编写上传记录的Go程序
1. 安装MinIO的Go SDK
首先安装MinIO的Go SDK:
1
| go get github.com/minio/minio-go/v7
|
2. 编写上传记录的Go程序
编写一个简单的Go程序来上传一条记录:
这里有一个桶的概念。桶(Bucket)是用来组织和管理数据的主要容器。每个桶可以包含任意数量的对象(文件),可以把桶想象成一个顶级文件夹,它用来存储数据对象。
1
2
3
4
5
6
7
8
9
10
11
12
13
14
15
16
17
18
19
20
21
22
23
24
25
26
27
28
29
30
31
32
33
34
35
36
37
38
39
40
41
42
43
44
45
46
47
48
| package main
import (
"bytes"
"context"
"fmt"
"log"
"github.com/minio/minio-go/v7"
"github.com/minio/minio-go/v7/pkg/credentials"
)
func main() {
minioClient, err := minio.New("localhost:9000", &minio.Options{
Creds: credentials.NewStaticV4("minioadmin", "minioadmin", ""),
Secure: false,
})
if err != nil {
log.Fatalln(err)
}
bucketName := "mybucket"
location := "china"
err = minioClient.MakeBucket(context.Background(), bucketName, minio.MakeBucketOptions{Region: location})
if err != nil {
exists, errBucketExists := minioClient.BucketExists(context.Background(), bucketName)
if errBucketExists == nil && exists {
fmt.Printf("Bucket '%s' already exists.\n", bucketName)
} else {
log.Fatalln(err)
}
} else {
fmt.Printf("Bucket '%s' created successfully.\n", bucketName)
}
recordContent := "This is a test record."
recordName := "test_record.txt"
_, err = minioClient.PutObject(context.Background(), bucketName, recordName, bytes.NewReader([]byte(recordContent)), int64(len(recordContent)), minio.PutObjectOptions{ContentType: "text/plain"})
if err != nil {
log.Fatalln(err)
}
fmt.Println("Record uploaded successfully.")
}
|
3. 运行程序
将上述Go代码保存为 main.go,然后运行它:

尝试删、改、查
上传对象
直接拆出来
1
2
3
4
5
6
7
8
9
10
11
12
| func uploadObject(minioClient minio.Client, bucketName string) {
recordContent := "This is a test record."
recordName := "test_record.txt"
_, err := minioClient.PutObject(context.Background(), bucketName, recordName, bytes.NewReader([]byte(recordContent)), int64(len(recordContent)), minio.PutObjectOptions{ContentType: "text/plain"})
if err != nil {
log.Fatalln(err)
}
fmt.Println("Record uploaded successfully.")
}
|
删除对象
删除一个已经存在的对象:
1
2
3
4
5
6
7
8
| func removeObject(minioClient *minio.Client, bucketName, objectName string) {
ctx := context.Background()
err := minioClient.RemoveObject(ctx, bucketName, objectName, minio.RemoveObjectOptions{})
if err != nil {
log.Fatalln(err)
}
log.Printf("Successfully deleted %s\n", objectName)
}
|

上传(修改)对象
上传一个新的对象或覆盖一个已经存在的对象可以视为“修改”操作:
1
2
3
4
5
6
7
8
9
10
11
| import "bytes"
func modifyObject(minioClient *minio.Client, bucketName, objectName, objectContent string) {
ctx := context.Background()
reader := bytes.NewReader([]byte(objectContent))
_, err := minioClient.PutObject(ctx, bucketName, objectName, reader, int64(len(objectContent)), minio.PutObjectOptions{ContentType: "text/plain"})
if err != nil {
log.Fatalln(err)
}
log.Printf("Successfully uploaded %s\n", objectName)
}
|

检索(查)对象
检索(查)操作包括列出所有对象名称和内容
1
2
3
4
5
6
7
8
9
10
11
12
13
14
15
16
17
18
19
20
21
22
23
24
25
26
27
28
29
30
31
32
|
func getObjectContent(minioClient *minio.Client, bucketName, objectName string) {
ctx := context.Background()
object, err := minioClient.GetObject(ctx, bucketName, objectName, minio.GetObjectOptions{})
if err != nil {
log.Fatalln(err)
}
defer object.Close()
data, err := io.ReadAll(object)
if err != nil {
log.Fatalln(err)
}
log.Printf("Content of %s: %s\n", objectName, string(data))
}
func listObjectsAndContents(minioClient *minio.Client, bucketName string) {
ctx := context.Background()
objectCh := minioClient.ListObjects(ctx, bucketName, minio.ListObjectsOptions{})
for object := range objectCh {
if object.Err != nil {
log.Fatalln(object.Err)
}
log.Printf("Found %s\n", object.Key)
getObjectContent(minioClient, bucketName, object.Key)
}
}
|

踩坑
目前最大的问题是dockerhub访问不了,有解决方式,包括挂代理、使用cloudflare托管等,我在这里找到了一个暂且还能使用的镜像源https://docker.1panel.live
数据安全
数据加密
服务器端上传加密,将对象通过自定义的密钥加密并上传至服务器,以保护数据安全。使用 encrypt.NewSSEC 函数来创建一个服务器端加密(SSE)对象,该函数接收一个密钥
1
2
3
4
5
6
7
8
9
10
11
12
13
14
15
16
17
18
19
20
21
22
23
24
25
26
27
28
29
30
31
32
33
34
35
36
37
38
39
40
41
42
43
44
45
46
47
48
49
50
51
52
53
54
55
56
57
58
59
60
61
62
63
64
65
| package main
import (
"context"
"log"
"github.com/minio/minio-go/v7"
"github.com/minio/minio-go/v7/pkg/credentials"
"github.com/minio/minio-go/v7/pkg/encrypt"
)
func main() {
endpoint := "play.min.io"
accessKeyID := "YOUR-ACCESSKEYID"
secretAccessKey := "YOUR-SECRETACCESSKEY"
useSSL := true
minioClient, err := minio.New(endpoint, &minio.Options{
Creds: credentials.NewStaticV4(accessKeyID, secretAccessKey, ""),
Secure: useSSL,
})
if err != nil {
log.Fatalln(err)
}
bucketName := "encrypted-bucket"
location := "us-east-1"
err = minioClient.MakeBucket(context.Background(), bucketName, minio.MakeBucketOptions{Region: location})
if err != nil {
exists, errBucketExists := minioClient.BucketExists(context.Background(), bucketName)
if errBucketExists == nil && exists {
log.Printf("Bucket %s already exists\n", bucketName)
} else {
log.Fatalln(err)
}
} else {
log.Printf("Bucket %s created successfully\n", bucketName)
}
encryptionKey := "MY-ENCRYPTION-KEY"
sse := encrypt.NewSSEC([]byte(encryptionKey))
objectName := "encrypted-file.txt"
filePath := "file.txt"
contentType := "application/text"
uploadInfo, err := minioClient.FPutObject(context.Background(), bucketName, objectName, filePath, minio.PutObjectOptions{
ContentType: contentType,
ServerSideEncryption: sse,
})
if err != nil {
log.Fatalln(err)
}
log.Printf("Successfully uploaded %s of size %d\n", objectName, uploadInfo.Size)
}
|
创建了一个名为“encrypted-bucket”的加密存储桶。然后,设置了一个自定义的加密密钥,并使用该密钥对文件进行加密上传。上传到Minio服务器的文件将以加密形式存储,保护了数据的机密性。
访问控制
除了数据加密,Minio还提供了访问控制功能,可以帮助用户控制对存储桶和对象的访问权限。通过设置适当的访问策略,用户可以限制谁可以读取和写入存储桶中的对象,从而提高数据的安全性。
1
2
3
4
5
6
7
8
9
10
11
12
13
14
15
16
17
18
19
20
21
22
23
24
25
26
27
28
29
30
31
32
33
34
35
36
37
38
39
40
41
42
43
44
45
46
47
48
49
50
51
52
53
54
55
56
57
58
59
| package main
import (
"context"
"fmt"
"log"
"github.com/minio/minio-go/v7"
"github.com/minio/minio-go/v7/pkg/credentials"
)
func main() {
endpoint := "play.min.io"
accessKeyID := "YOUR-ACCESSKEYID"
secretAccessKey := "YOUR-SECRETACCESSKEY"
useSSL := true
minioClient, err := minio.New(endpoint, &minio.Options{
Creds: credentials.NewStaticV4(accessKeyID, secretAccessKey, ""),
Secure: useSSL,
})
if err != nil {
log.Fatalln(err)
}
bucketName := "encrypted-bucket"
username := "specific-user"
policy := `{
"Version": "2012-10-17",
"Statement": [
{
"Effect": "Allow",
"Principal": {"AWS": "arn:aws:iam::` + username + `"},
"Action": [
"s3:PutObject",
"s3:DeleteObject"
],
"Resource": "arn:aws:s3:::` + bucketName + `/*"
},
{
"Effect": "Allow",
"Principal": "*",
"Action": "s3:GetObject",
"Resource": "arn:aws:s3:::` + bucketName + `/*"
}
]
}`
err = minioClient.SetBucketPolicy(context.Background(), bucketName, policy)
if err != nil {
log.Fatalln(err)
}
fmt.Println("Bucket policy set successfully.")
}
|
创建一个策略文档,其中包含两个声明: 第一个声明:允许特定用户(通过其ARN表示)进行写操作(包括PutObject和DeleteObject)。 第二个声明:允许所有用户进行读操作(GetObject)。
SSL/TLS支持
Minio还支持通过SSL/TLS对数据进行安全传输。通过启用SSL/TLS,所有传输的数据都将进行加密,从而防止中间人攻击和数据泄露。
1
2
3
4
5
6
7
8
9
10
11
12
13
14
15
16
17
18
19
20
21
22
23
24
25
26
27
| package main
import (
"log"
"github.com/minio/minio-go/v7"
"github.com/minio/minio-go/v7/pkg/credentials"
)
func main() {
endpoint := "play.min.io"
accessKeyID := "YOUR-ACCESSKEYID"
secretAccessKey := "YOUR-SECRETACCESSKEY"
useSSL := true
minioClient, err := minio.New(endpoint, &minio.Options{
Creds: credentials.NewStaticV4(accessKeyID, secretAccessKey, ""),
Secure: useSSL,
})
if err != nil {
log.Fatalln(err)
}
log.Println("Successfully connected to Minio server.")
}
|
版本控制
通过启用版本控制,Minio可以保存对象的多个版本,以防止数据丢失和意外删除。
1
2
3
4
5
6
7
8
9
10
11
12
13
14
15
16
17
18
19
20
21
22
23
24
25
26
27
28
29
30
31
32
33
34
35
| package main
import (
"context"
"log"
"github.com/minio/minio-go/v7"
"github.com/minio/minio-go/v7/pkg/credentials"
)
func main() {
endpoint := "play.min.io"
accessKeyID := "YOUR-ACCESSKEYID"
secretAccessKey := "YOUR-SECRETACCESSKEY"
useSSL := true
minioClient, err := minio.New(endpoint, &minio.Options{
Creds: credentials.NewStaticV4(accessKeyID, secretAccessKey, ""),
Secure: useSSL,
})
if err != nil {
log.Fatalln(err)
}
bucketName := "my-bucket"
err = minioClient.EnableVersioning(context.Background(), bucketName)
if err != nil {
log.Fatalln(err)
}
log.Println("Versioning enabled successfully.")
}
|
锁定措施
通过启用对象锁定,Minio可以保护数据免受意外删除或覆盖,并实现数据保留和合规性要求。
1
2
3
4
5
6
7
8
9
10
11
12
13
14
15
16
17
18
19
20
21
22
23
24
25
26
27
28
29
30
31
32
33
34
35
36
37
38
39
40
41
42
43
44
45
46
47
48
49
50
51
52
53
54
55
| package main
import (
"context"
"log"
"time"
"github.com/minio/minio-go/v7"
"github.com/minio/minio-go/v7/pkg/credentials"
)
func main() {
endpoint := "play.min.io"
accessKeyID := "YOUR-ACCESSKEYID"
secretAccessKey := "YOUR-SECRETACCESSKEY"
useSSL := true
minioClient, err := minio.New(endpoint, &minio.Options{
Creds: credentials.NewStaticV4(accessKeyID, secretAccessKey, ""),
Secure: useSSL,
})
if err != nil {
log.Fatalln(err)
}
bucketName := "my-lock-enabled-bucket"
err = minioClient.MakeBucket(context.Background(), bucketName, minio.MakeBucketOptions{ObjectLocking: true})
if err != nil {
log.Fatalln(err)
}
log.Println("Bucket with object lock enabled created successfully.")
objectName := "my-object.txt"
filePath := "path/to/your/file.txt"
contentType := "application/text"
lockMode := minio.Governance
retainUntilDate := time.Now().Add(24 * time.Hour)
uploadInfo, err := minioClient.PutObject(context.Background(), bucketName, objectName, filePath, -1, minio.PutObjectOptions{
ContentType: contentType,
RetainUntilDate: retainUntilDate,
Mode: lockMode,
})
if err != nil {
log.Fatalln(err)
}
log.Printf("Successfully uploaded %s with lock mode %s until %v\n", objectName, lockMode, retainUntilDate)
}
|
数据完整性检查
通过计算文件的哈希值并在上传和下载过程中进行验证,可以确保数据在传输过程中没有被损坏。
1
2
3
4
5
6
7
8
9
10
11
12
13
14
15
16
17
18
19
20
21
22
23
24
25
26
27
28
29
30
31
32
33
34
35
36
37
38
39
40
41
42
43
44
45
46
47
48
49
50
51
52
53
54
55
56
57
58
59
60
61
62
63
64
65
66
67
68
69
70
71
72
73
74
75
76
77
| package main
import (
"context"
"crypto/sha256"
"fmt"
"io"
"log"
"os"
"github.com/minio/minio-go/v7"
"github.com/minio/minio-go/v7/pkg/credentials"
)
func main() {
endpoint := "play.min.io"
accessKeyID := "YOUR-ACCESSKEYID"
secretAccessKey := "YOUR-SECRETACCESSKEY"
useSSL := true
minioClient, err := minio.New(endpoint, &minio.Options{
Creds: credentials.NewStaticV4(accessKeyID, secretAccessKey, ""),
Secure: useSSL,
})
if err != nil {
log.Fatalln(err)
}
bucketName := "my-bucket"
objectName := "my-object.txt"
filePath := "path/to/your/file.txt"
file, err := os.Open(filePath)
if err != nil {
log.Fatalln(err)
}
defer file.Close()
hash := sha256.New()
tee := io.TeeReader(file, hash)
uploadInfo, err := minioClient.PutObject(context.Background(), bucketName, objectName, tee, -1, minio.PutObjectOptions{})
if err != nil {
log.Fatalln(err)
}
log.Printf("Successfully uploaded %s of size %d\n", objectName, uploadInfo.Size)
log.Printf("SHA-256 hash: %x\n", hash.Sum(nil))
downloadFilePath := "path/to/your/downloaded_file.txt"
err = minioClient.FGetObject(context.Background(), bucketName, objectName, downloadFilePath, minio.GetObjectOptions{})
if err != nil {
log.Fatalln(err)
}
downloadedFile, err := os.Open(downloadFilePath)
if err != nil {
log.Fatalln(err)
}
defer downloadedFile.Close()
downloadHash := sha256.New()
if _, err := io.Copy(downloadHash, downloadedFile); err != nil {
log.Fatalln(err)
}
log.Printf("Downloaded file SHA-256 hash: %x\n", downloadHash.Sum(nil))
if hash.Sum(nil) == downloadHash.Sum(nil) {
log.Println("Data integrity verified successfully.")
} else {
log.Println("Data integrity verification failed.")
}
}
|
在上传文件时,通过io.TeeReader同时计算文件的SHA-256哈希值。 下载文件后,重新计算下载文件的SHA-256哈希值。 比较上传和下载文件的哈希值以验证数据的完整性。

